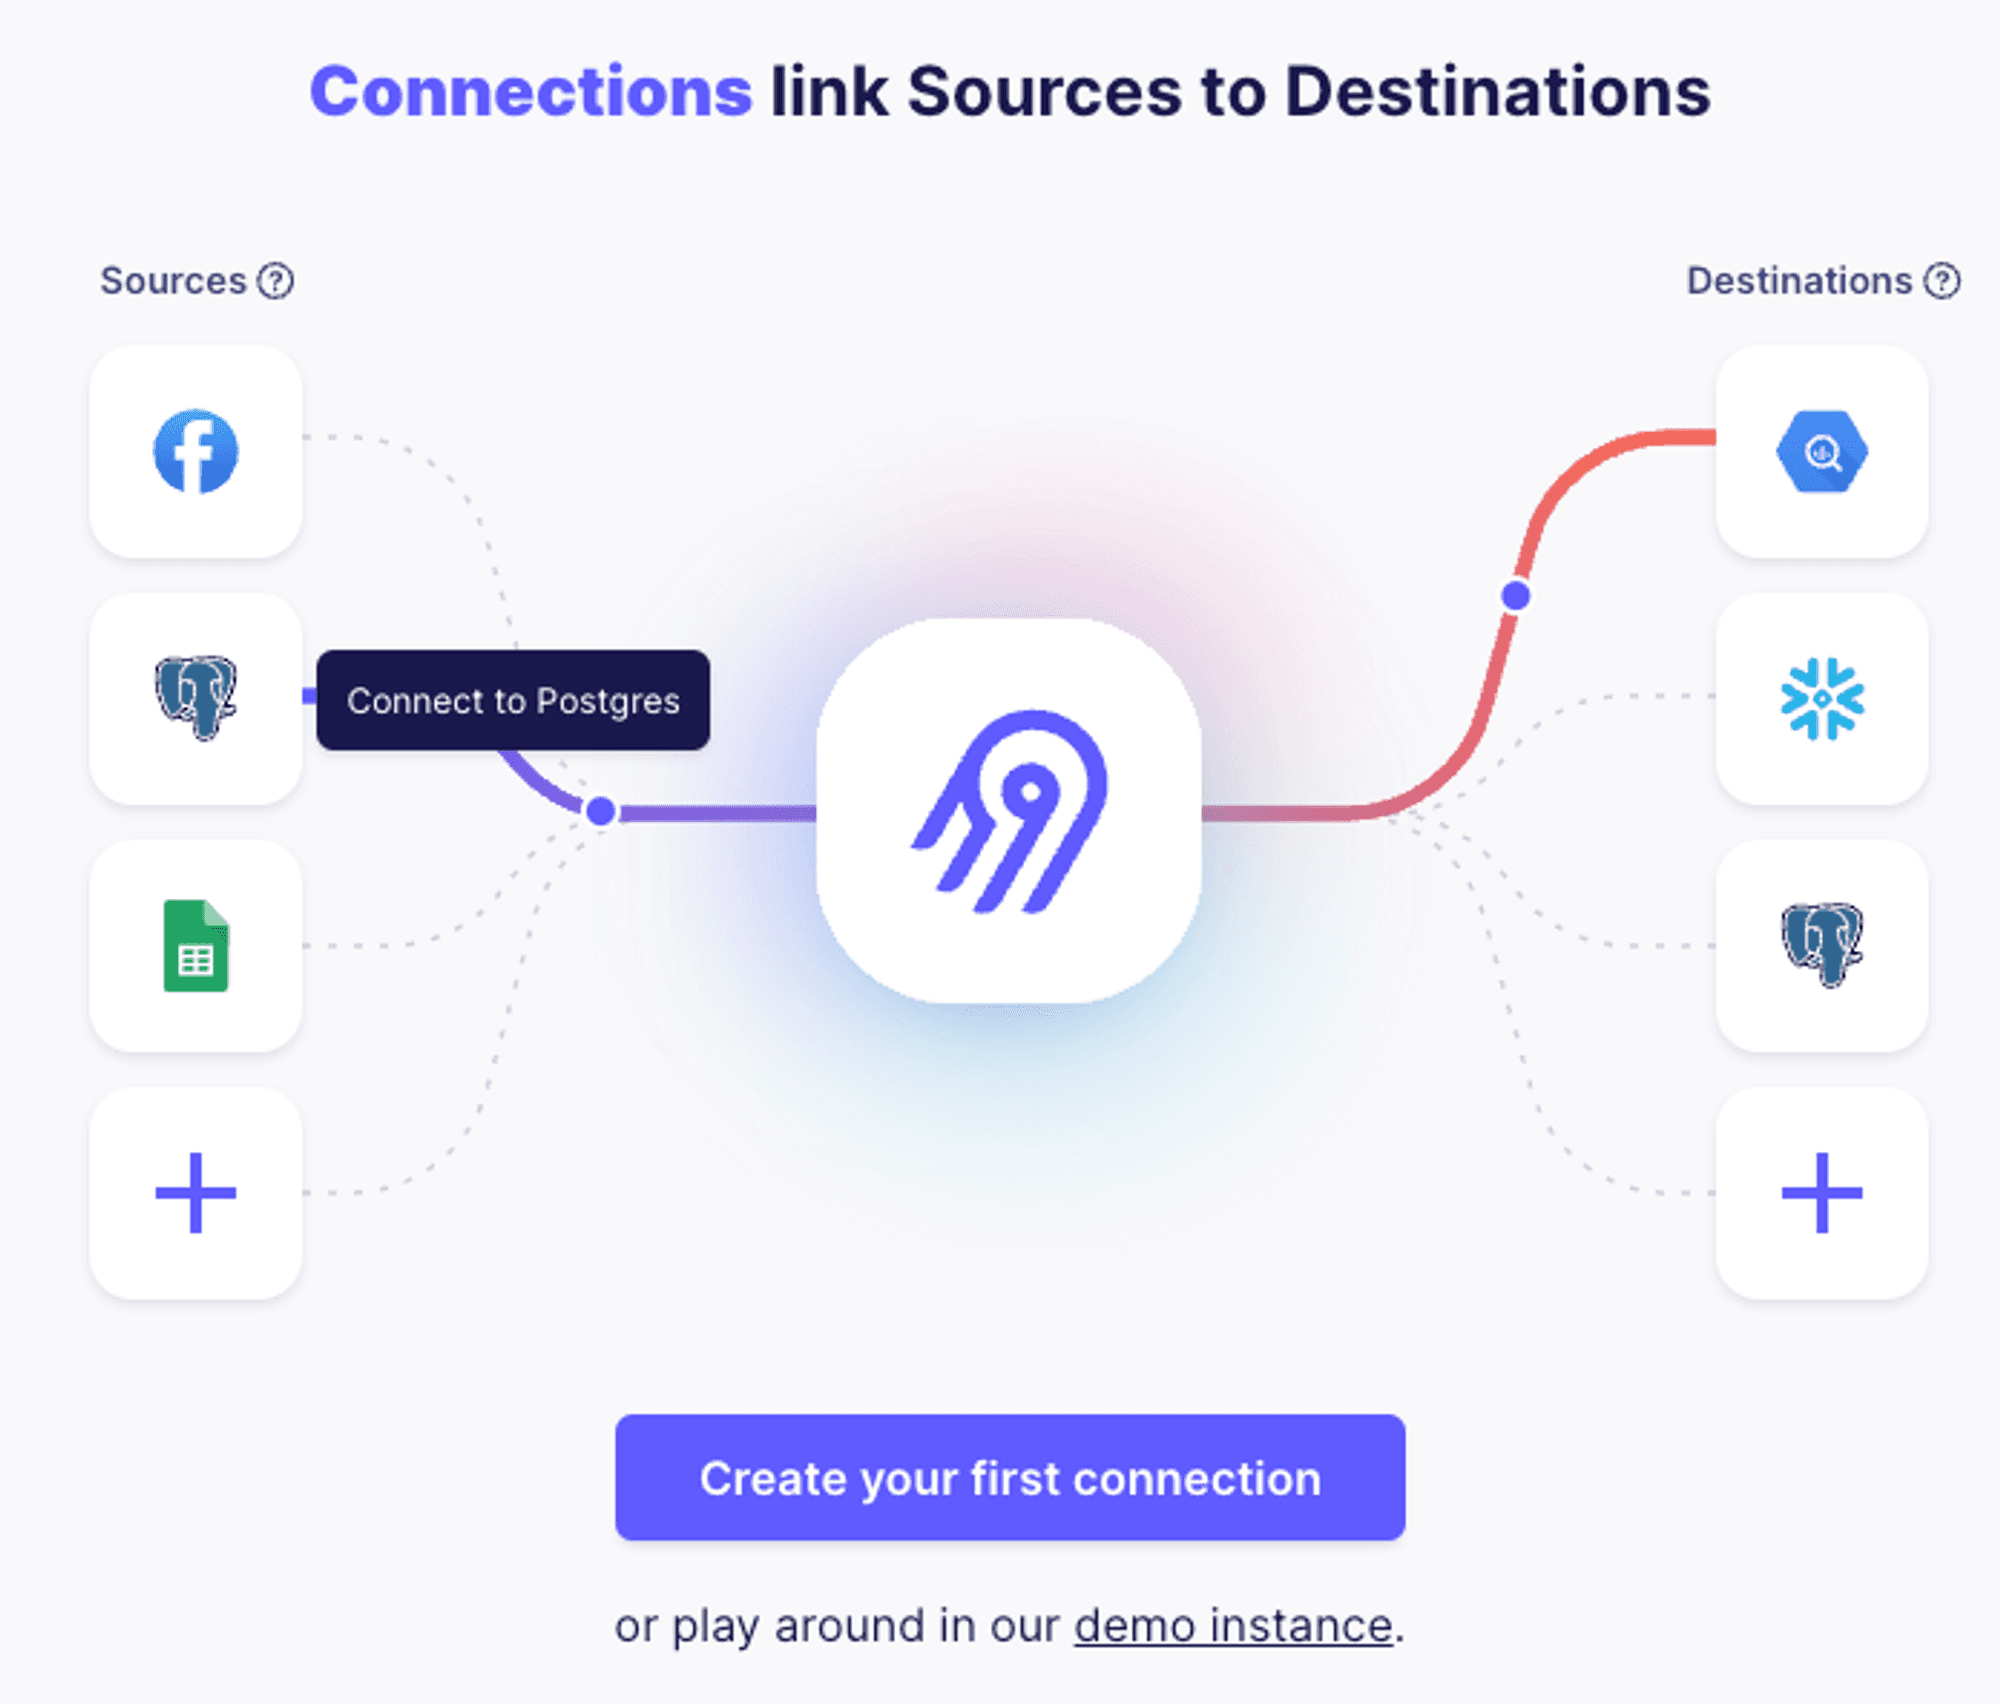
Introduction to Airbyte and the Pinecone connector
The Pinecone connector for Airbyte is all about leveraging the extensive range of Airbyte's source connectors and bringing them together with Pinecone's capabilities. It's about creating a seamless flow of data, with the ability to embed and upsert information, all in a way that's tailored to your specific use cases.
This post aims to provide a clear and practical overview of the Pinecone Airbyte connector. From enhancing semantic search capabilities to building intelligent recommendation systems, the Pinecone Airbyte connector offers a versatile solution. By tapping into Airbyte's extensive array of source connectors, you can explore new ways to enrich your data-driven projects and achieve your specific goals.
So let's dive in and explore what makes this connector a valuable addition to your data integration toolbox, without the complexity or constraints of a one-size-fits-all solution.
Features and Technical Details
The Pinecone connector is easy to use, yet very powerful. Here's what you need to know:
Integration with Airbyte
- Source Connectors: Airbyte's extensive selection of hundreds of source connectors is at the heart of this integration. The Pinecone Airbyte connector enables you to tap into various data sources, creating a seamless flow of information into Pinecone's vector database.
- Configuration Simplicity: Setting up the connector requires only some basic configuration details, such as the Pinecone API key and the specifications of your source system. No need for complex integration steps or on-premises deployment.
- Column Embedding and Metadata Upsert: You can specify which column to use for embedding and define the chunk size and metadata fields. The connector will then embed the indicated column for each row and upsert the embeddings along with the metadata as defined.
- Incremental sync: Airbyte supports syncing data incrementally, which means only new data will be processed - instead of reprocessing the entire dataset whenever any change is made in the connection source. When enabled, incremental sync will ensure only new data is embedded and upserted which could greatly optimize cost.
Flexibility and Adaptability
- Free and Open Source: The connector is available to everyone, offering a free and open-source solution to handle specific data integration needs.
- Extensible: Designed with adaptability in mind, the Pinecone Airbyte connector will allow users to utilize other embedding models hosted elsewhere in the future.
Use Cases
Here are some of the use cases and industry applications for the Pinecone Airbyte connector, categorized by specific source connectors. This is by no means an extensive list, but it will give us a good idea of how these systems could be used in conjunction with Pinecone.
Source Connector Use Cases PostgreSQL Data analytics; Real-time reporting. BigQuery Large-scale data analysis; Machine learning integration. Salesforce Customer relationship management; Lead scoring. HubSpot Marketing automation; Customer segmentation. Shopify Personalized product recommendations;
This table showcases the wide range of applications that the Pinecone Airbyte connector can enable by leveraging different source connectors. It illustrates how you can address unique challenges and opportunities across various industries, making the most of Airbyte's rich selection of source connectors. In this upcoming series, we will explore these use-cases in greater depth.
What does the connector do?
The connector iterates over the rows in the source connection, embeds one selected column and optionally adds metadata based on a subset of selected columns. The embedding is done using one of the following methods:
- OpenAI - using the OpenAI API, the connector will produce embeddings using the text-embedding-ada-002 model.
- Cohere - using the Cohere API, the connector will produce embeddings using the embed-english-light-v2.0 model.
Once a connection is created, the connector will pull data from the configured source and then pass it to the Pinecone destination, which includes the embedding process and synchronizing the data with the configured Pinecone index.
How do I use the connector?
To use the connector, we’ll create a new connection between a simple source and the Pinecone destination.
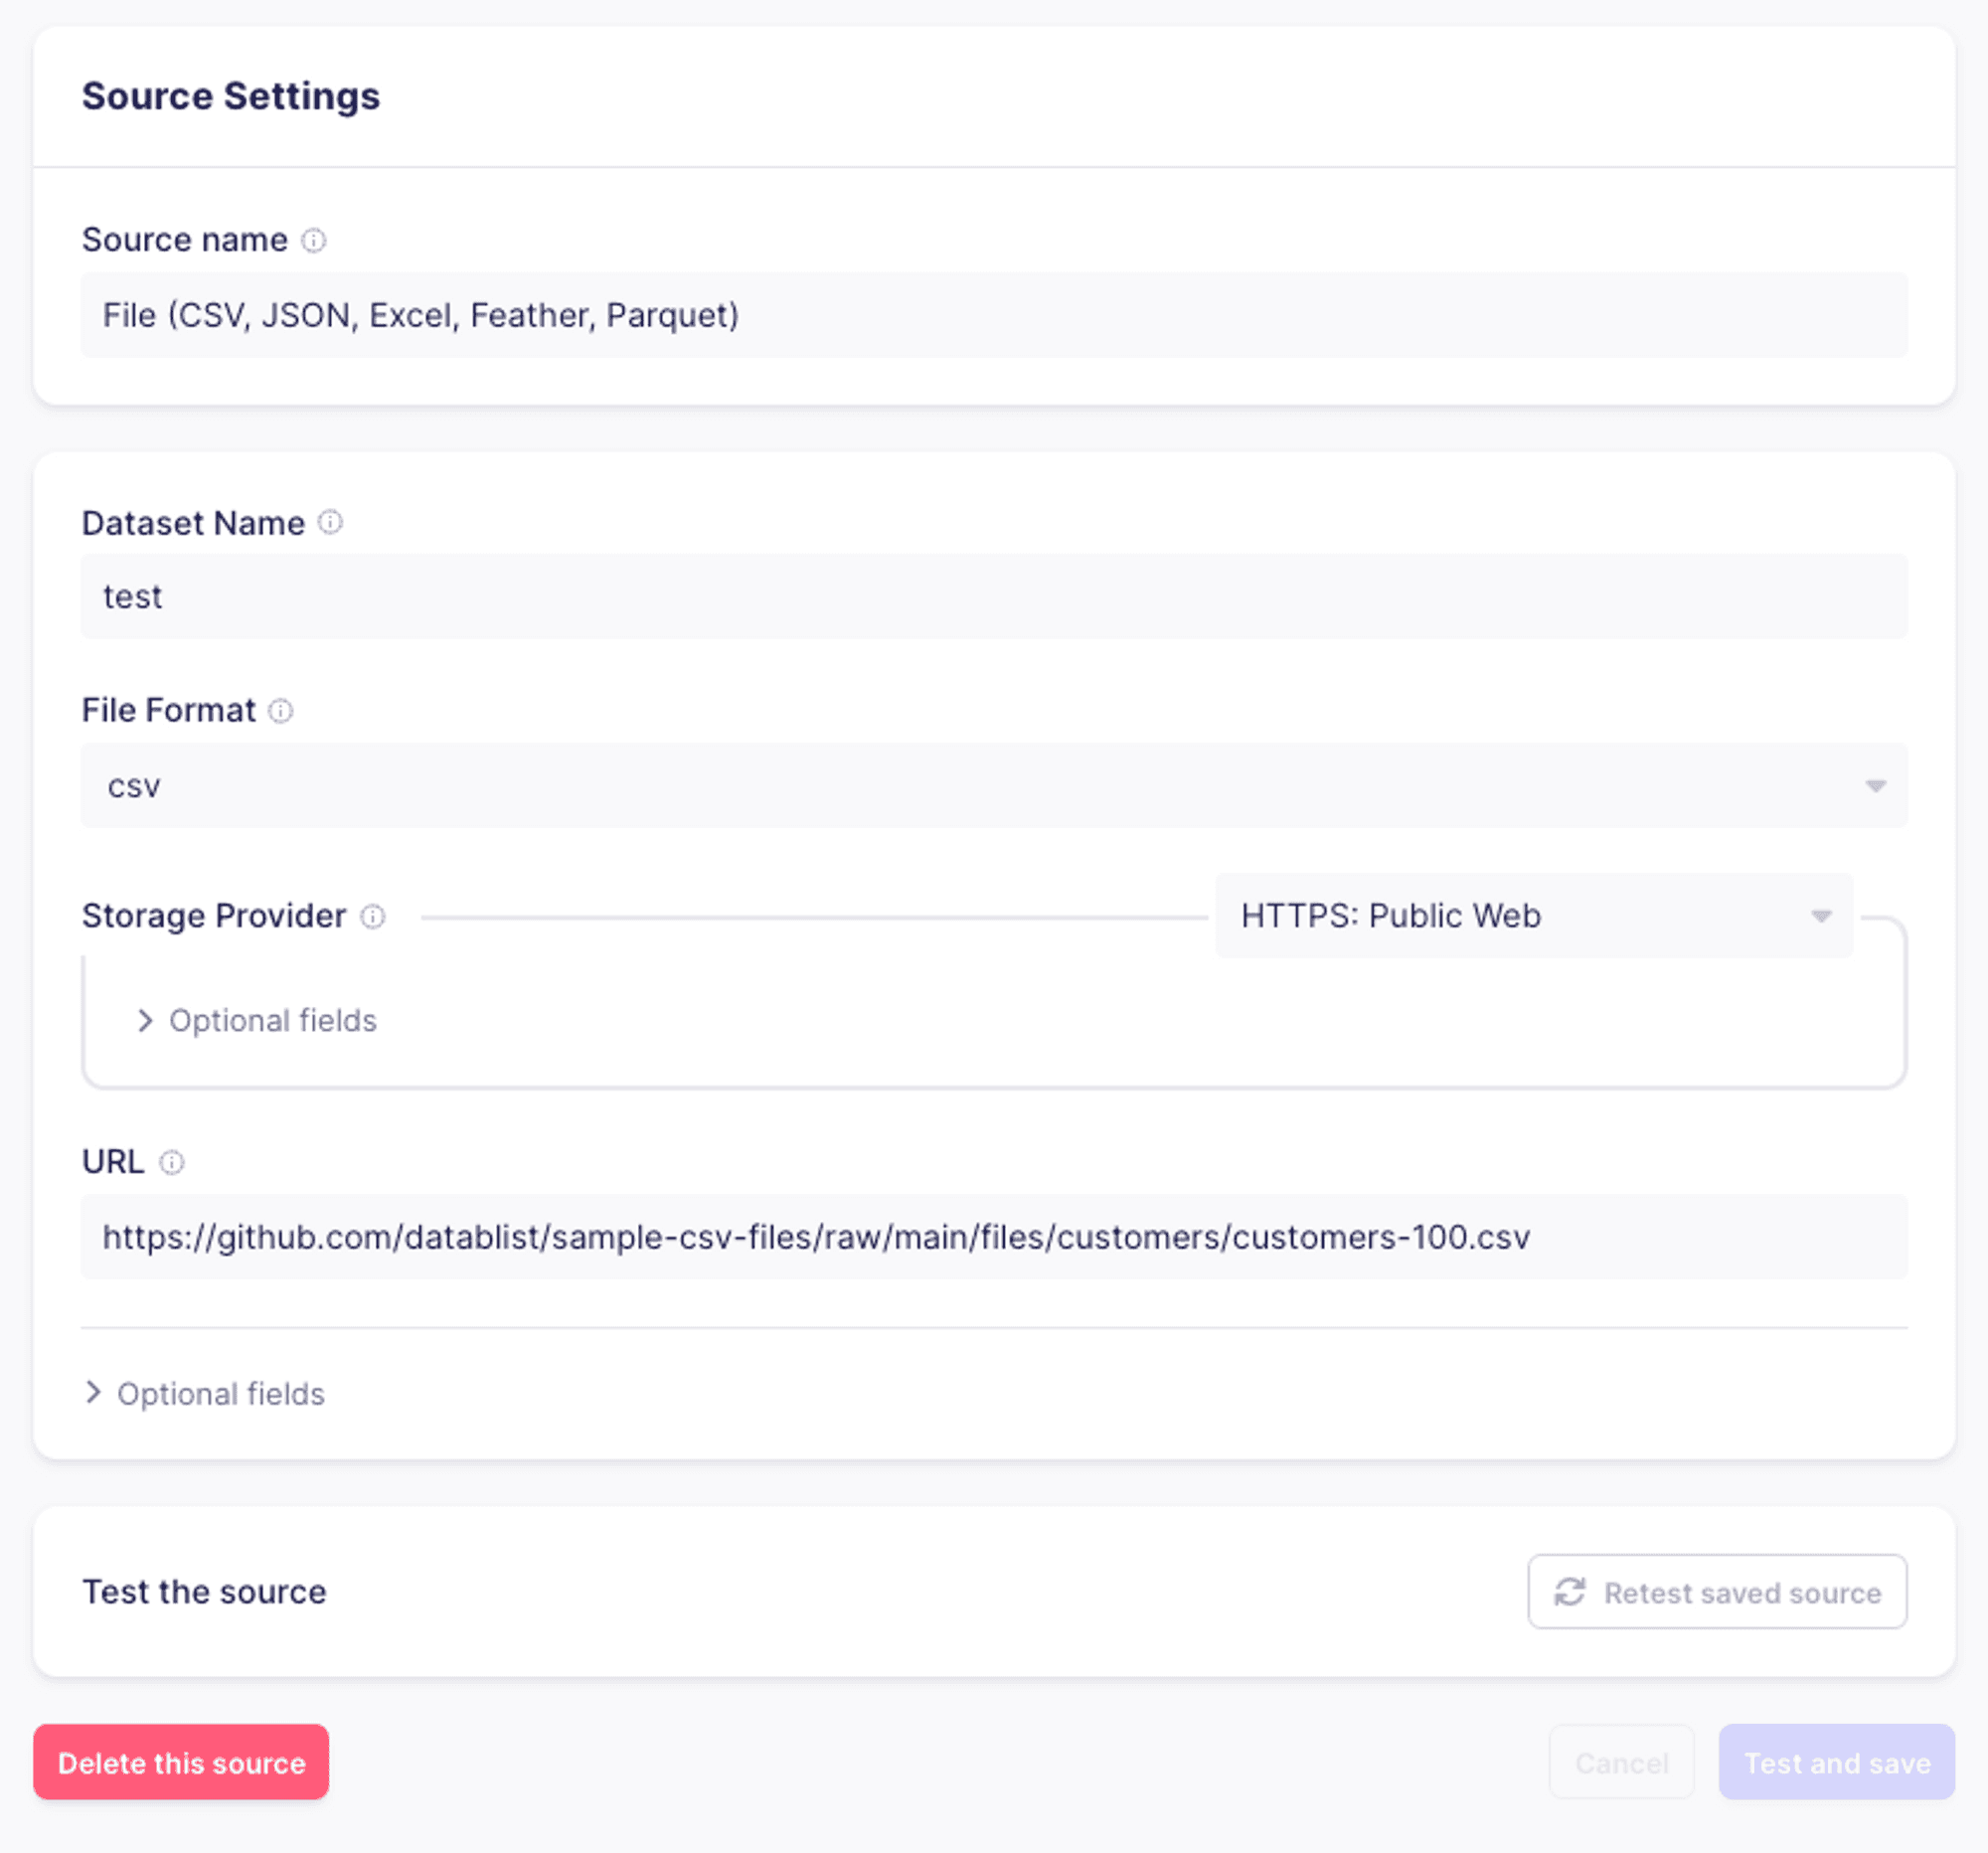
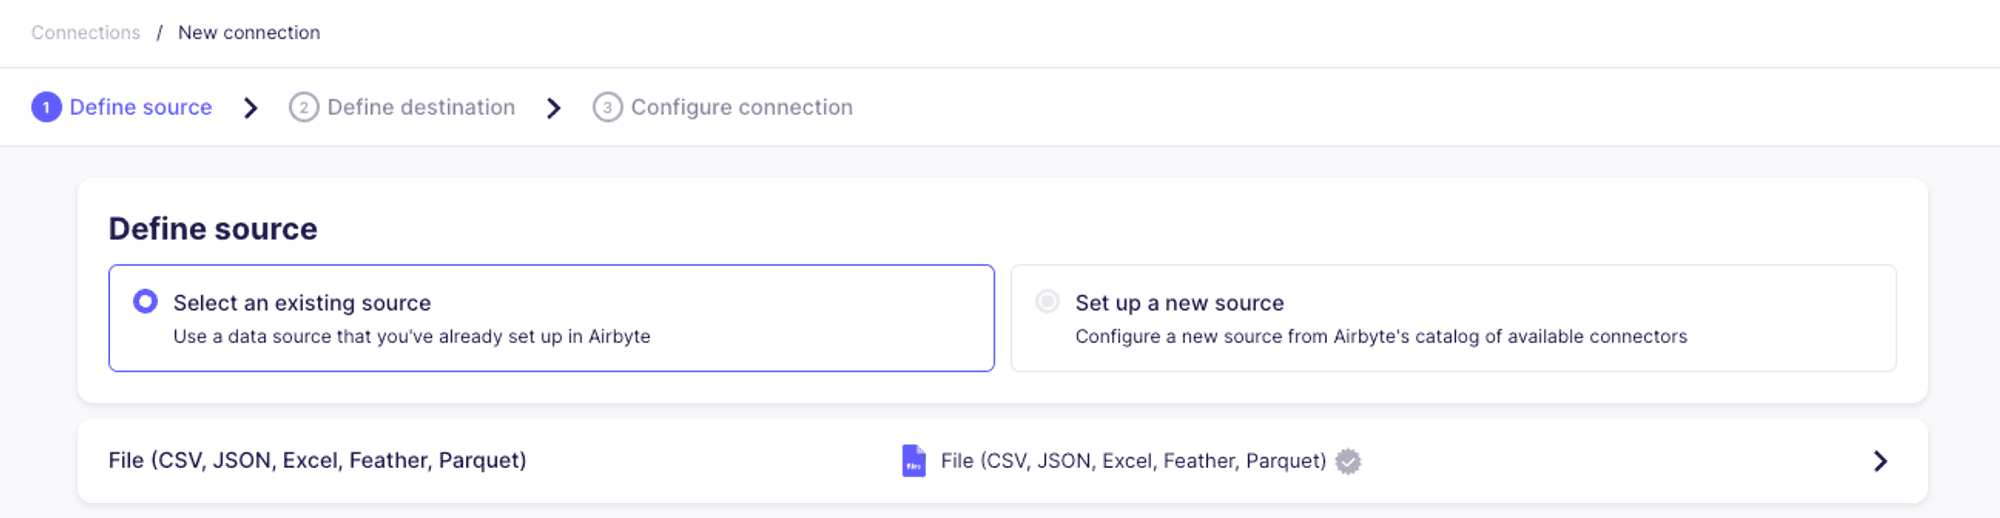
Configure a source connector
For the purpose of this example, we’ll use a simple CSV as the source data for our connection.
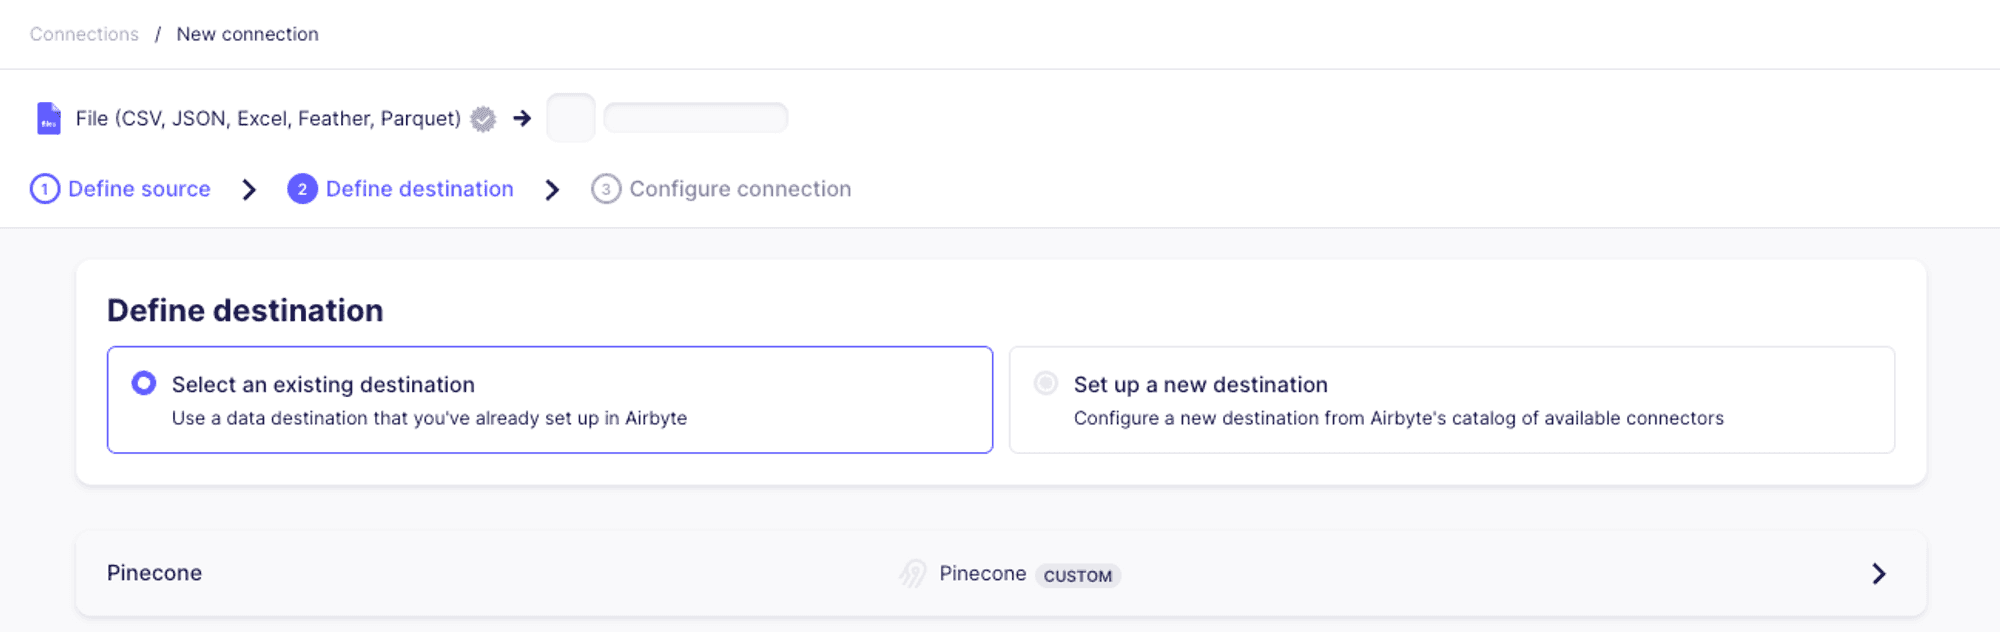
Configure a new “Pinecone” destination
From the list of connectors, select “Pinecone”. You’ll then see a configuration screen. The configuration for the connector has three sections:
- Processing: handles how the records will be processed, which fields of the records will be embedded and which will be used as metadata.
- Pinecone configuration: this is where you’ll provide the connector with configuration information for your Pinecone index.
- Embedding: this is where you’ll provide the connector with the API key for your embedding provider.
Processing
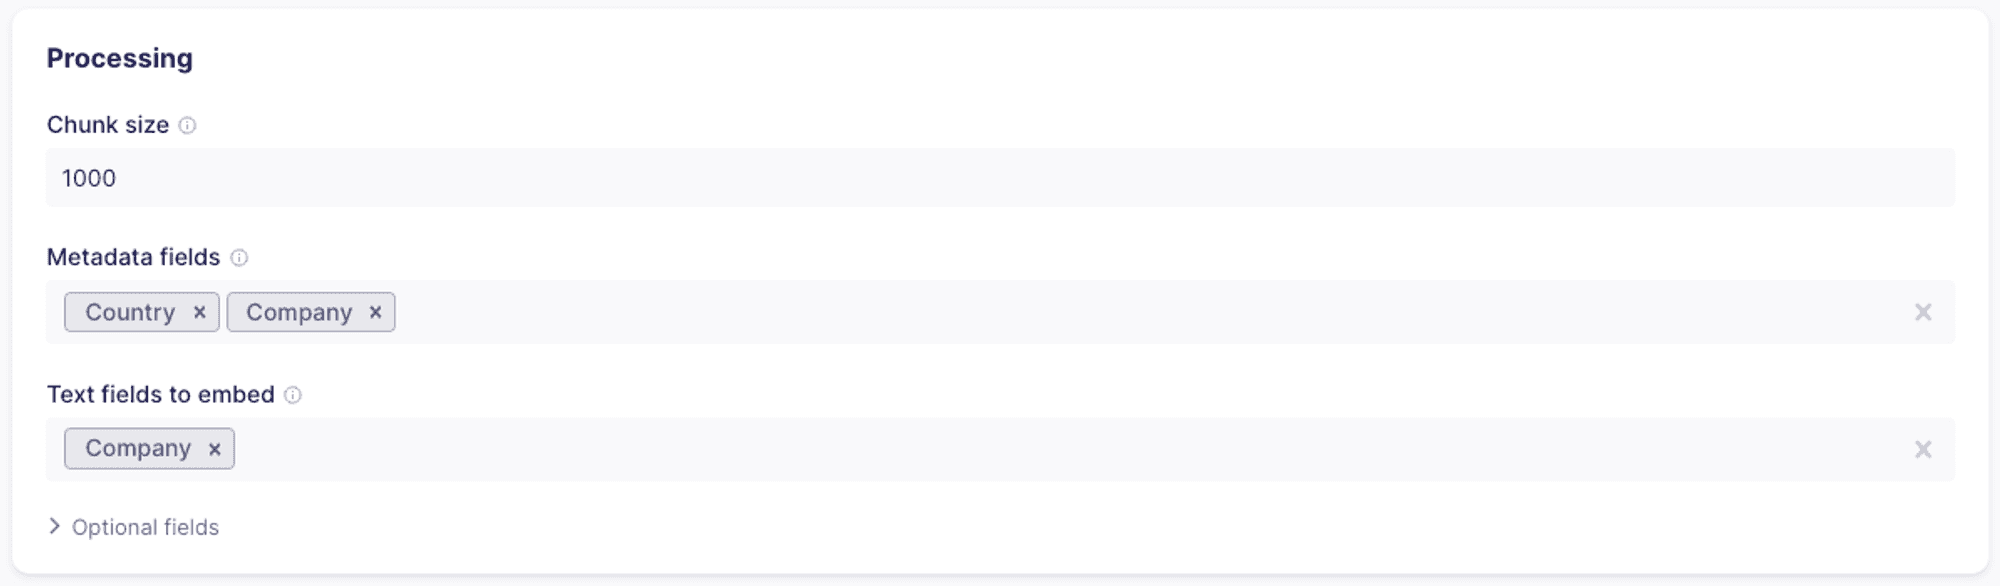
- Chunk size: If the intended content you want to embed is long, you may choose a specific chunk size. The connector will split the selected text field into chunks in the specified size and then embed and upsert each chunk. Each chunk will include the metadata field _ab_record_id which references the original record from which the chunk was created.
- Metadata fields: for each embedding you create, you can associate some or all of the columns as metadata. Please note that there is a 40kb size limit to the metadata stored.
- Text fields to embed: you can choose one or more fields to use as the source for the embeddings. If more than one field is selected, the text from each will be combined before embedding.
Pinecone configuration
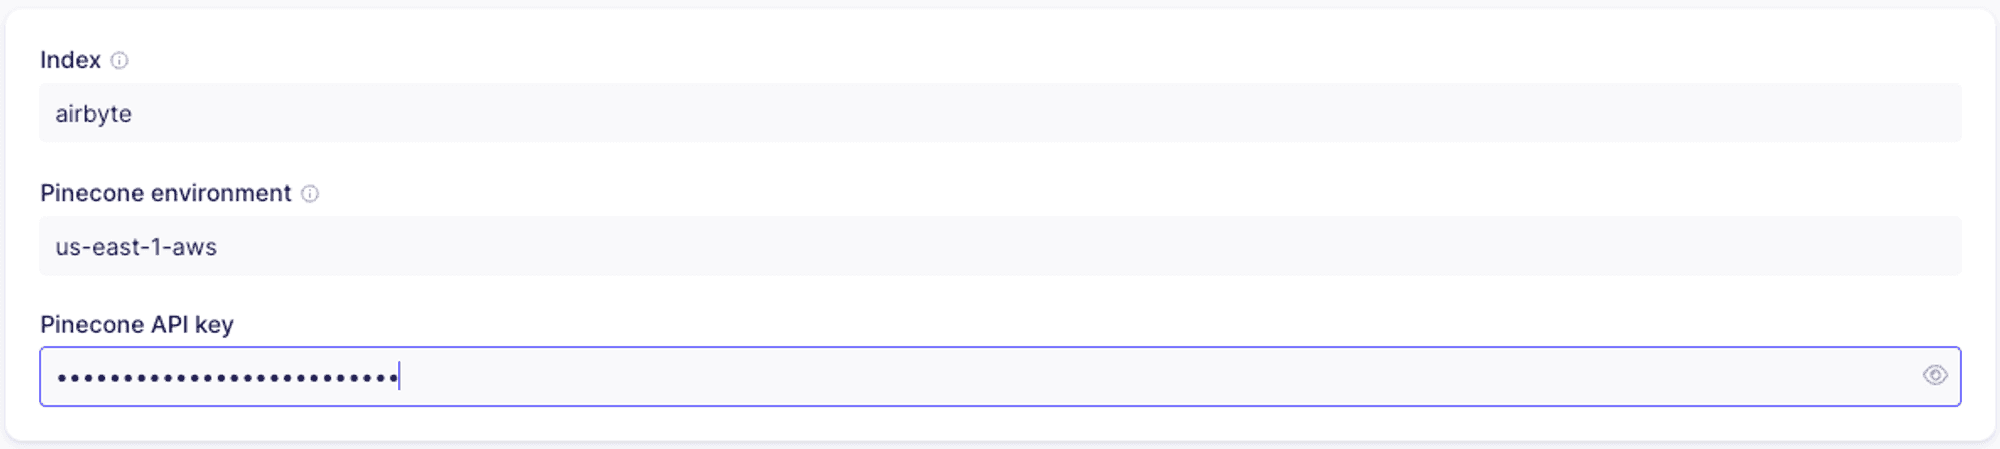
- Index: the name of the index you’ll use. You’ll need to create the index either in the Pinecone console or programmatically prior to setting up the connector.
- Pinecone environment: the environment for your Pinecone project. This may be found in the Pinecone console.
- Pinecone API key: you can retrieve the API key from the Pinecone console.
Embedding
As mentioned above, you’ll be able to choose between OpenAI and Cohere as your providers. You’ll have to provide the API key for your embedding provider.

Testing
Once you created the destination, you’ll click “Test and save” to make sure everything is configured properly and all the connections are working.
Create a new connection
Once we set up our source and destination, we’ll set up a new connection. Assuming this is our first connection, we’ll see this dialog:
We’ll start by selecting the source:
Then select Pinecone as the destination:
Next, we’ll set up the connection configuration. For the purposes of this example, we’ll set the replication frequency to “Manual”.
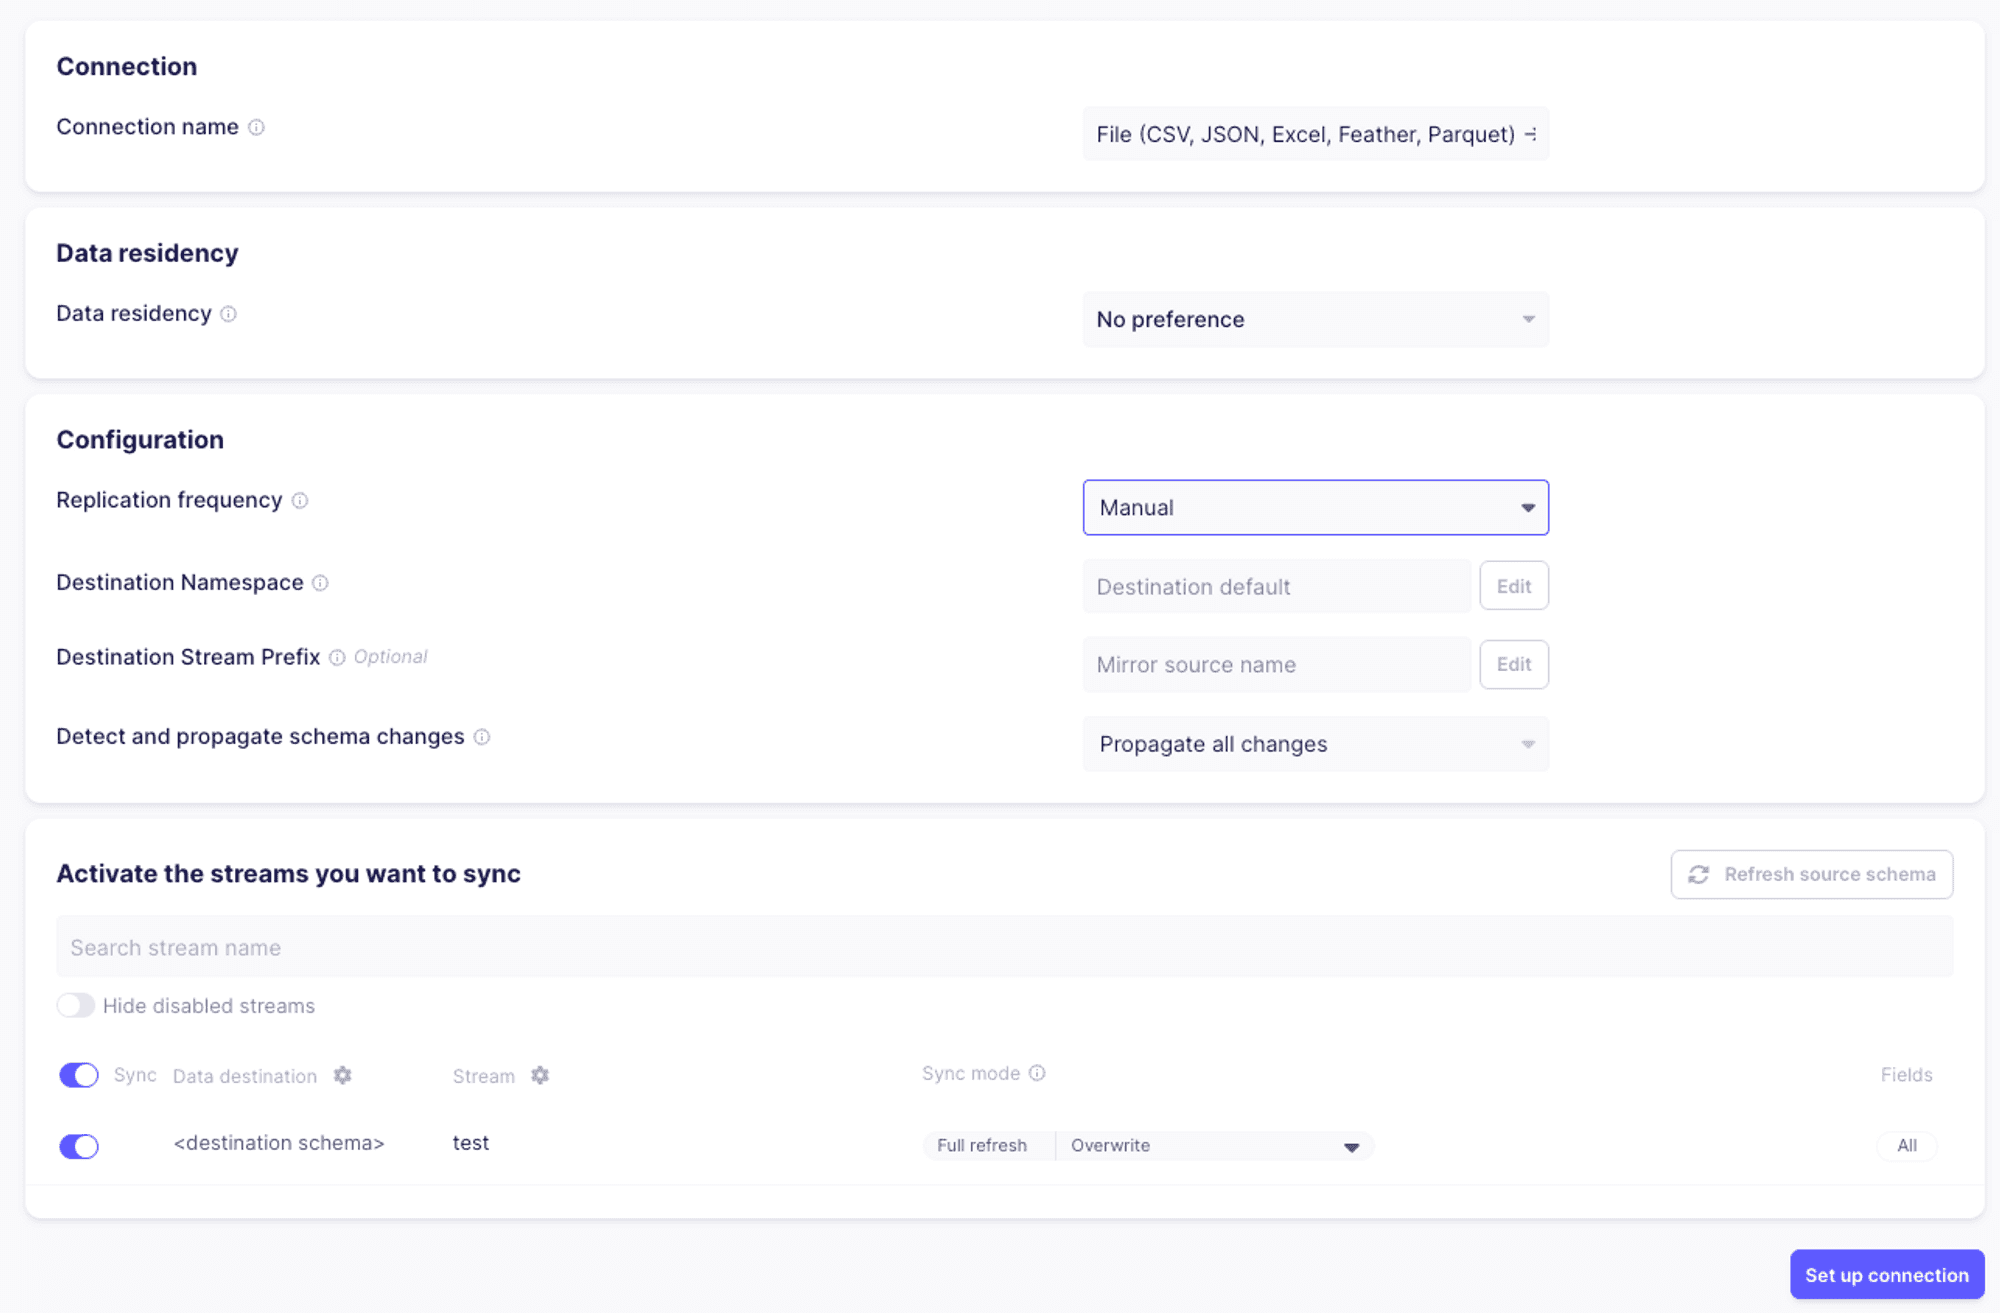
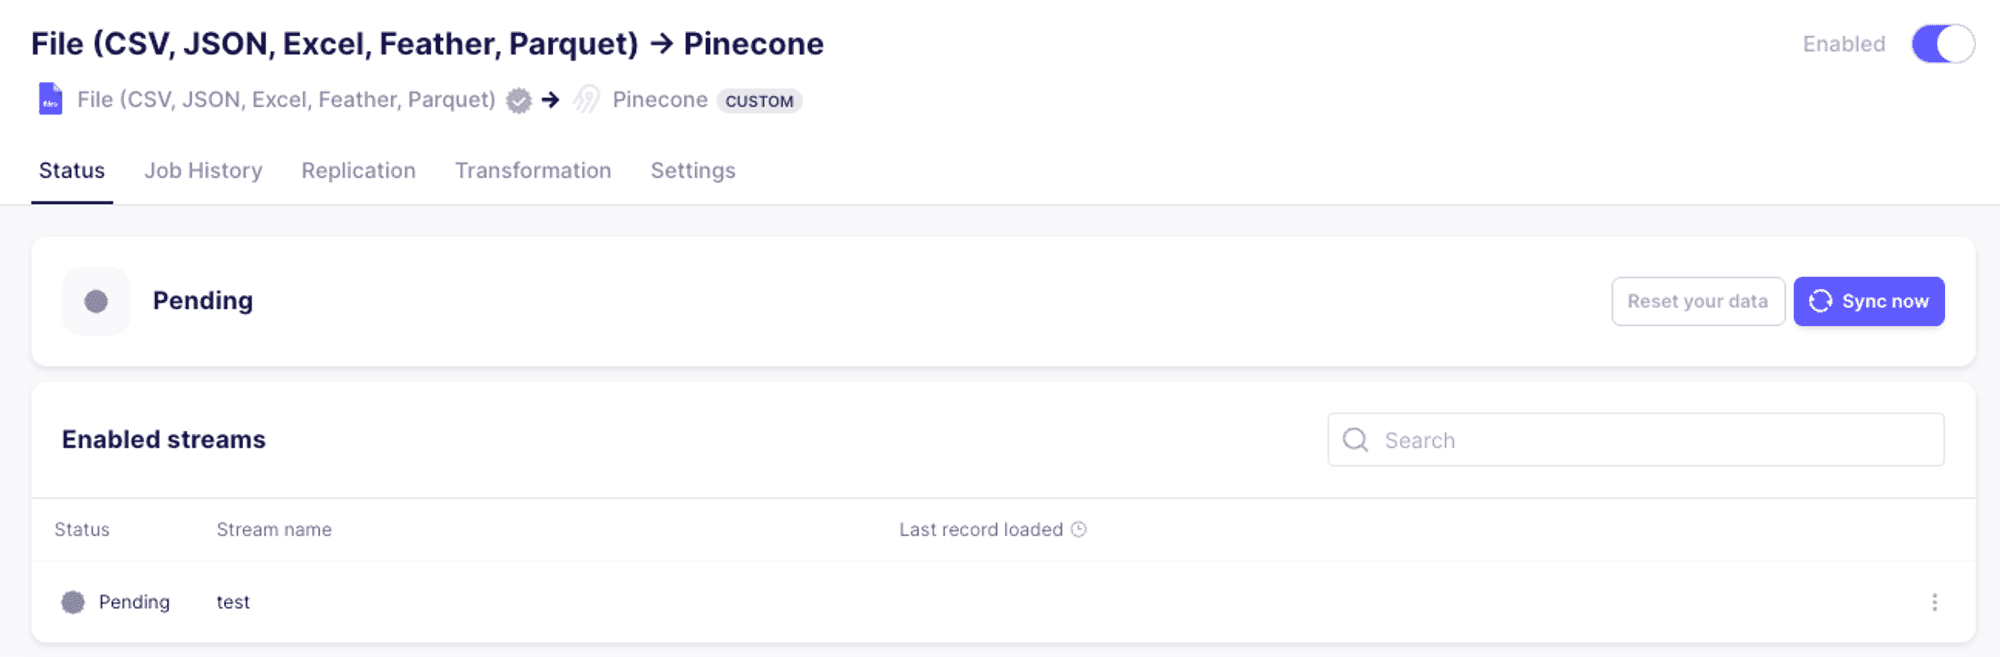
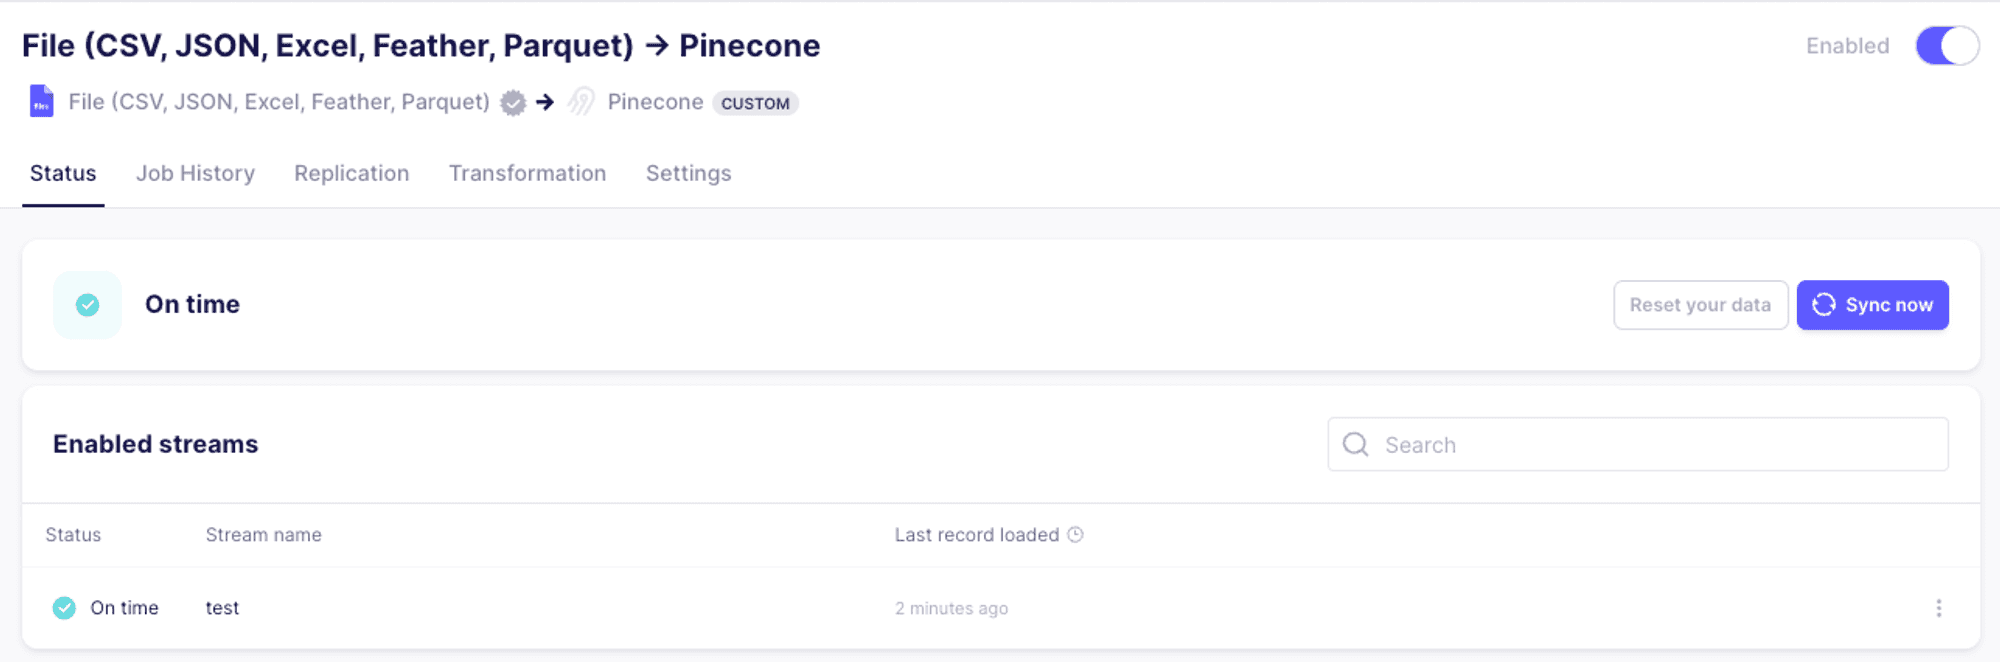
Once the connection is set up, we’ll hit “Sync now” to test our connector end to end.
Once the synchronization process has completed, we should see the following:
Summary
In this first look at the Pinecone connector for Airbyte, we reviewed some of the possible use cases for the connector, and saw how to set up the connector and how it works end to end. In the upcoming parts of this series, we’ll delve deeper into more complex integrations, and discuss the various features of Airbyte and how they interact with Pinecone.